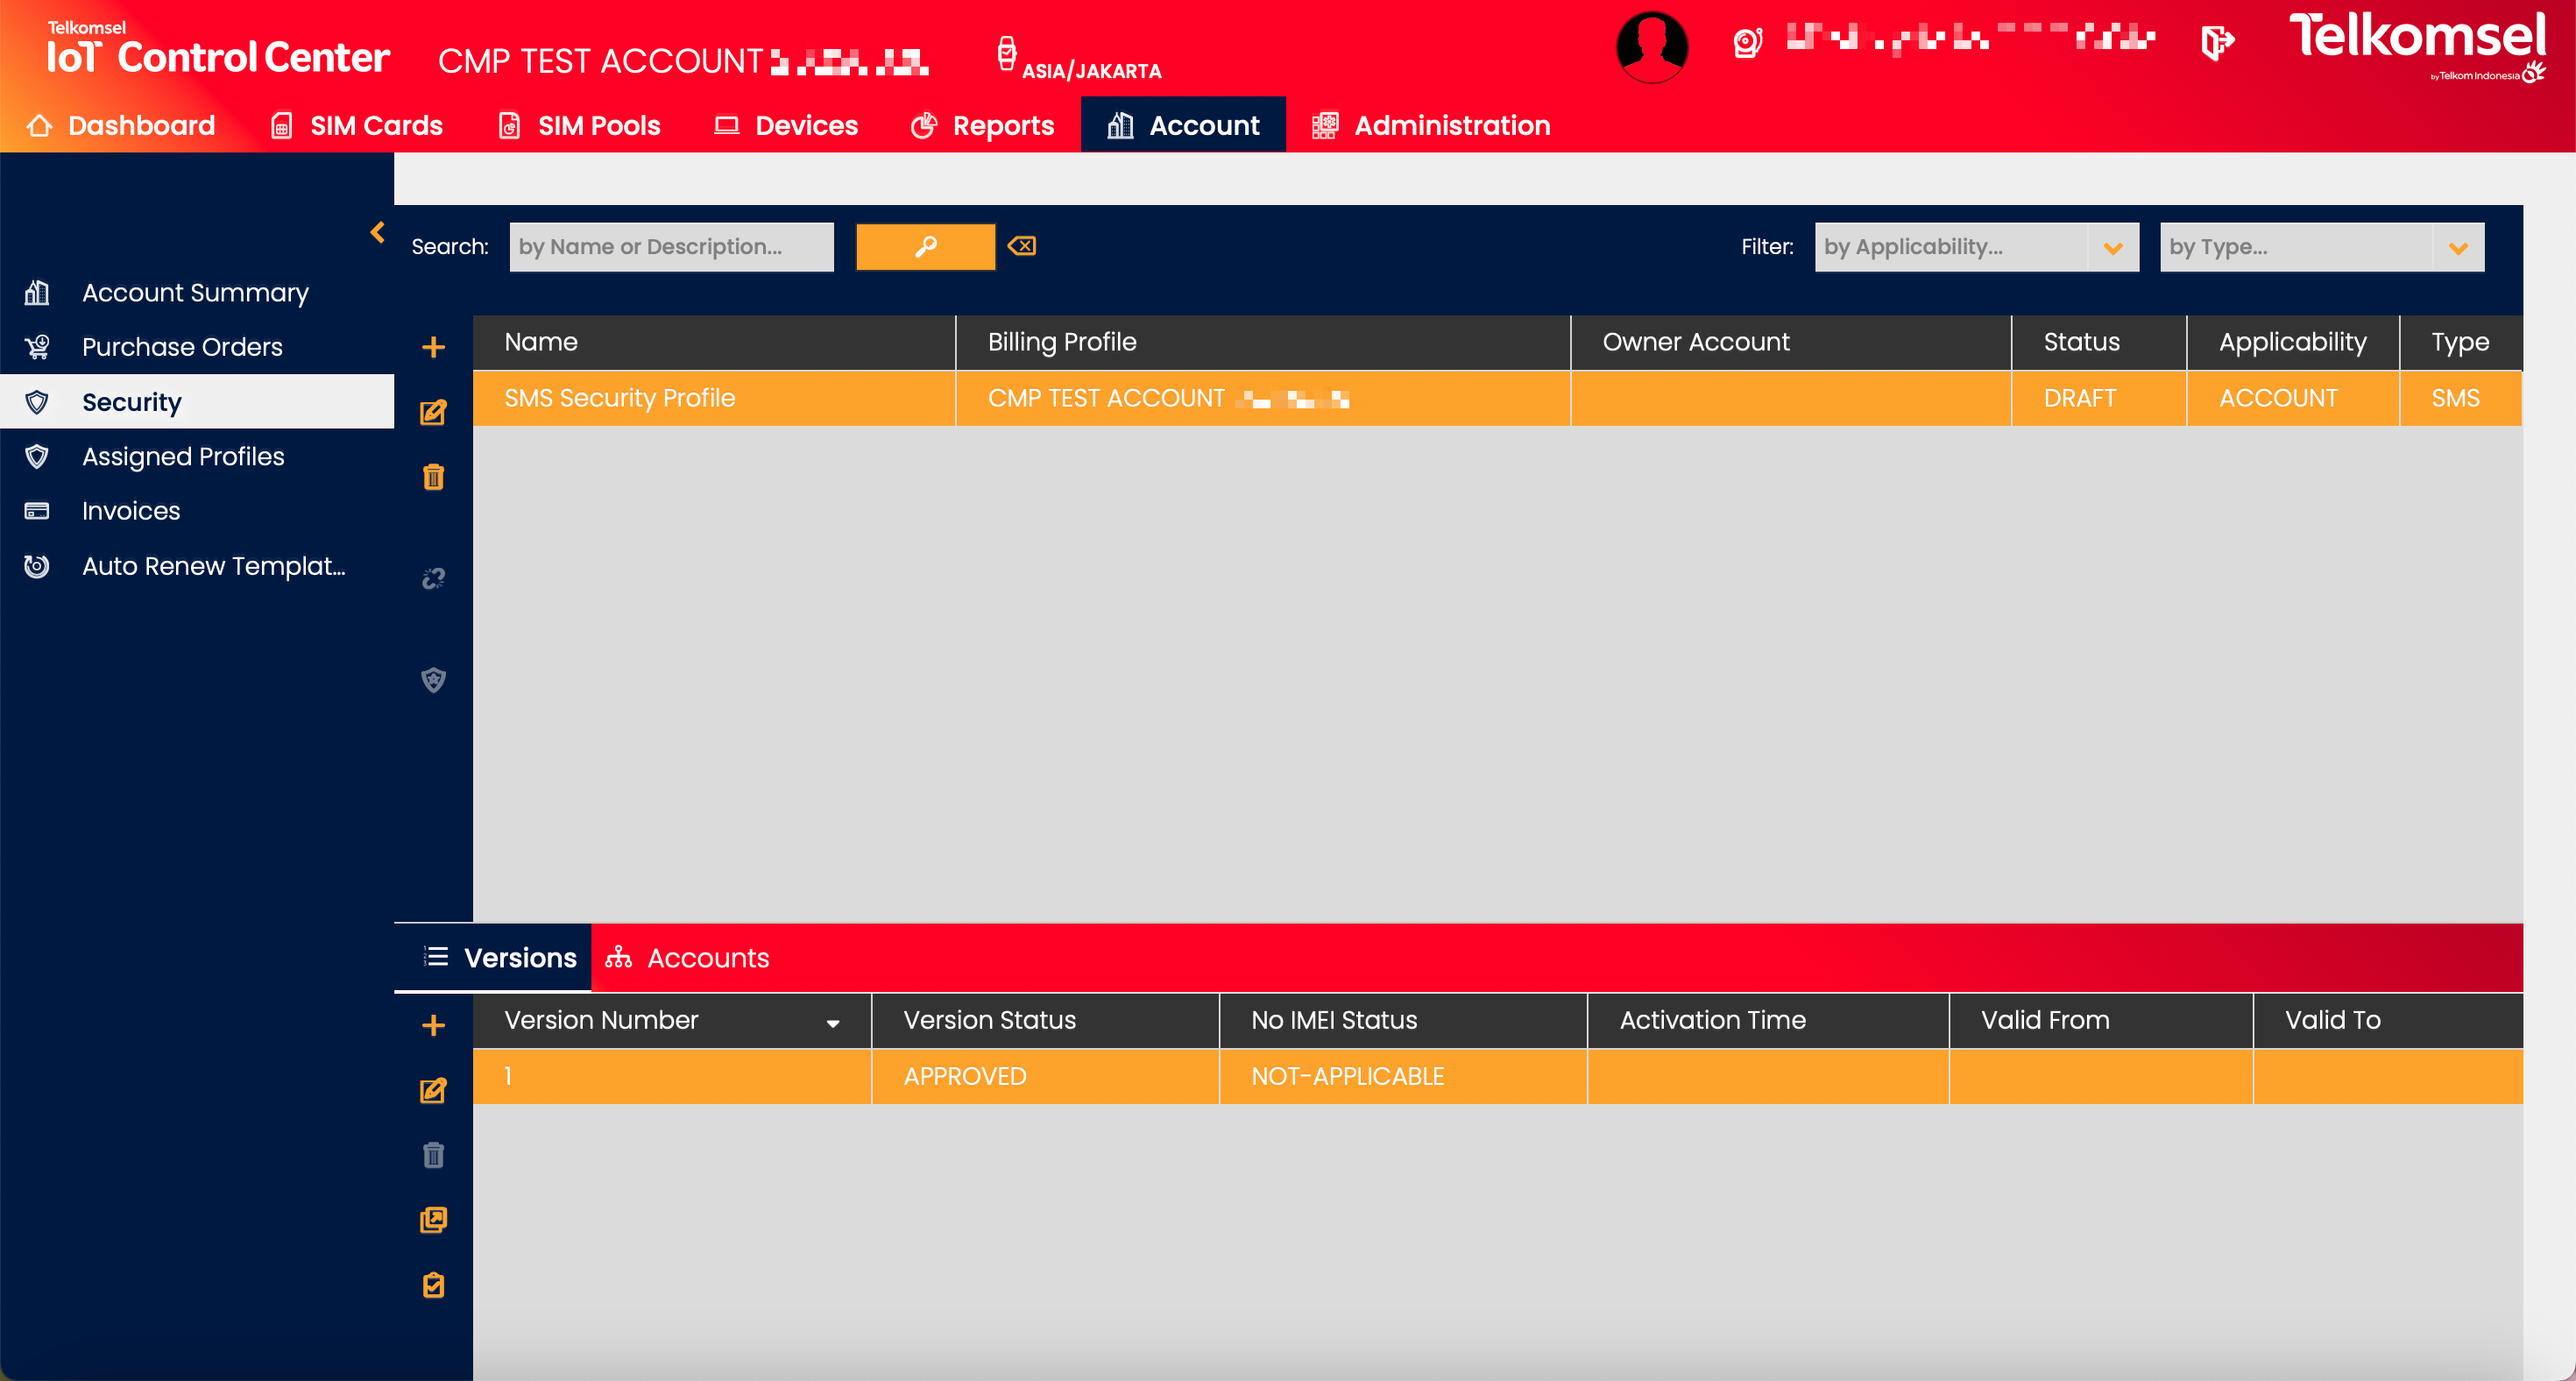
Security
Note:
- The Security section of the Enterprise Portal is only available in Account context.
- All Voice-related options and use cases are only applicable and available in case Voice Services are licensed on the CMP instance.
Introduction
The Security module allows the Enterprise Account to manage the Security Profiles which have been assigned to the Account by the Service Provider, as well as create its own Security Profiles.
Note:
The Security function of the Enterprise Portal is only available on Account level. To access the function make sure to switch the context to an Account.
Security Profiles prevent SIMs from using data in unauthorized devices, sending/receiving SMS from unwanted MSISDN, and making/receiving voice calls from unwanted MSISDN.
Security Profiles protect against SIM usage that could be the result of:
Theft
Device installation error
Hardware/software malfunctions
Malicious interference with a Device/SIM (“hacking”)
Security Profiles are created for a specific Account (i.e. not Root level) and can be defined as
Account Level: Security Profile applies to all SIMs in the Account,
SIM Level: Security Profile can be applied to one or many SIMs in the Account, or
Parent Account Level: Security Profile applies to all SIMs in the Account and all of its Sub-Accounts
However, Security Profiles are not needed for all Accounts. If an Account does not have a Security Profile assigned, the default policy of allow will be applied and no further security policy checks will be made. Even though the SIM and/or Account does not have a Security Profile assigned, it is subject to the assigned Service Profile, Roaming Profile, Price Plan, etc., which can also lead to restrictions in regard to using certain services.
Accounts and SIM Cards can have none, one, or many Security Profiles assigned. Each Security Profile has a service to which it applies (i.e. data, SMS, or voice) and an Account or a SIM Card can have only one active Account Level Security Profile of each service.
Access Rights: A User Account must possess the requisite Security Profile Access Rights to view and carry out the workflows described here.
CMP Security Profiles use an Access List, made up of a Whitelist or Blacklist, to control both Data and SMS permission for the IMSI of each SIM. Each Security Profile can include a whitelist and one blacklist, furthermore for the Security Profile to be activated at least one whitelist or blacklist must be included in the Security Profile.
Whitelists: Data is only allowed when a device's IMEID is included in the Whitelist, SMS can only be sent/received to/from MSISDNs included in the Whitelist, or Voice calls can only be made/received to/from MSISDNs included in the Whitelist. Any non-listed IMEID or MSISDN is blocked.
Blacklists: Data is not allowed when the device's IMEID is included in the Blacklist, SMS cannot be sent/received to/from MSISDNs included in the Blacklist, or Voice calls cannot be made/received to/from MSISDNs included in the Blacklist. Any non-listed IMEID or MSISDN is allowed.
Search for a Security Profile
The search option of the Security module allows Users to retrieve a list of Security Profiles by entering text into the Search field.
Search results may be filtered with the criteria given in the Search bar.
Filters:
- Applicability
- Type
The defined search criteria can be removed by clicking on the Clear search ![]() icon.
icon.

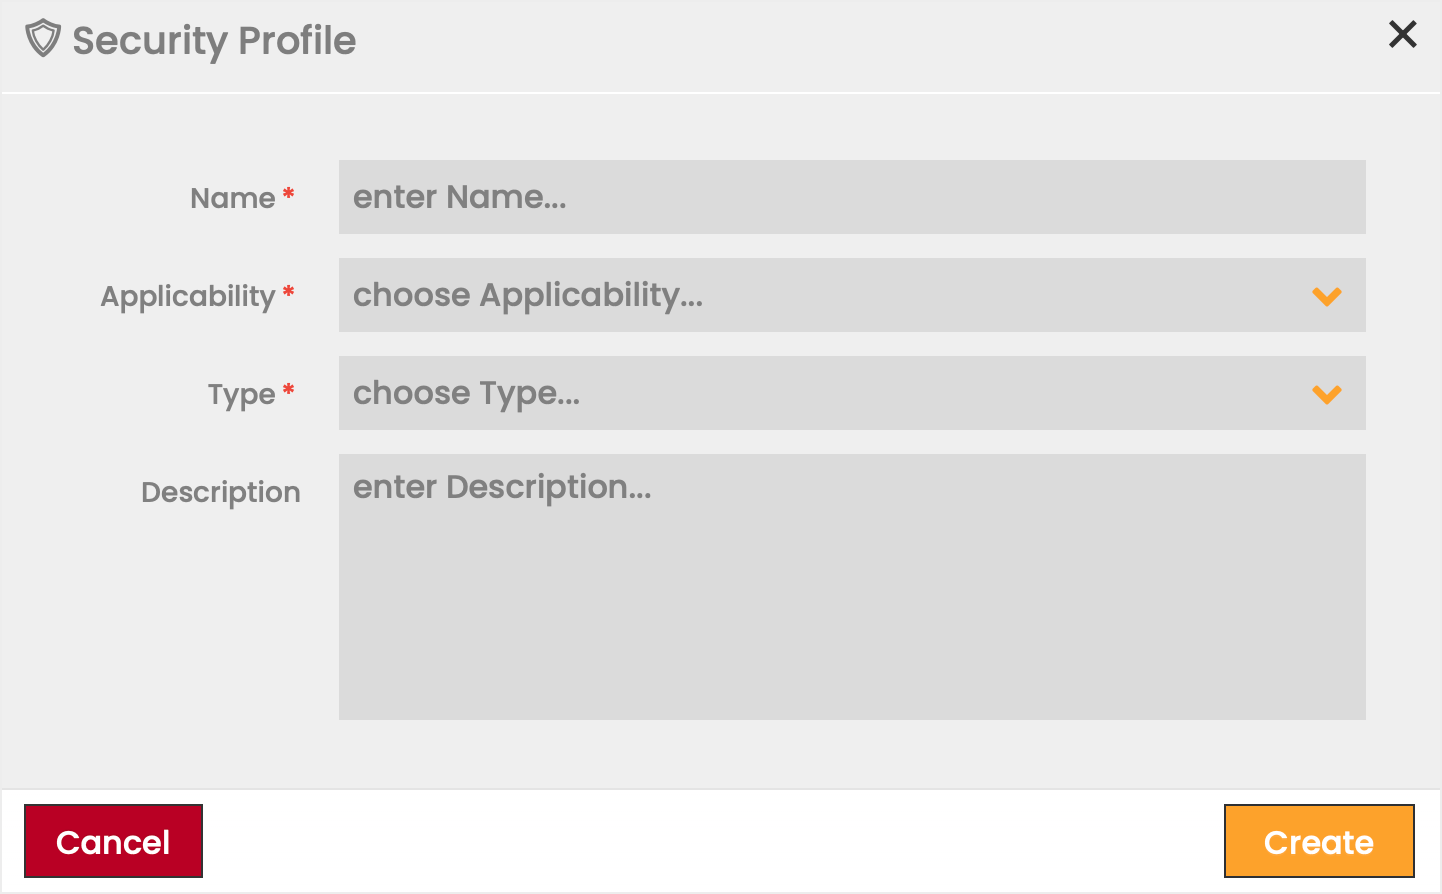
Create a Security Profile
To create a Security Profile:
- Click on the Add
 icon.
icon. - Define the information fields for the new Security Profile.
Fields marked by a red asterisk are mandatory. - Click Create to save the new Security Profile.
Field | Description |
|---|---|
Name | Name of the Security Profile. |
Applicability |
|
Type |
|
Description | Comments/remarks regarding the Security Profile. |
Versions
Versions represent variations of a Security Profile that have different configurations and are represented by a Version Number. To provide flexibility, a Security Profile may possess many Versions, but only one may be set as Active.
Before a Security Profile can be activated and applied to SIM Cards, it must have at least one Version that has transitioned through an Approval Process to achieve the status Active.
The Version approval process facilitates workflow between Users with different roles: some Users may create and modify Versions while others can review and approve them. This can be achieved through the ACL Templates assigned in the CAS User Management application.
Versions can be created and managed in the Versions panel.
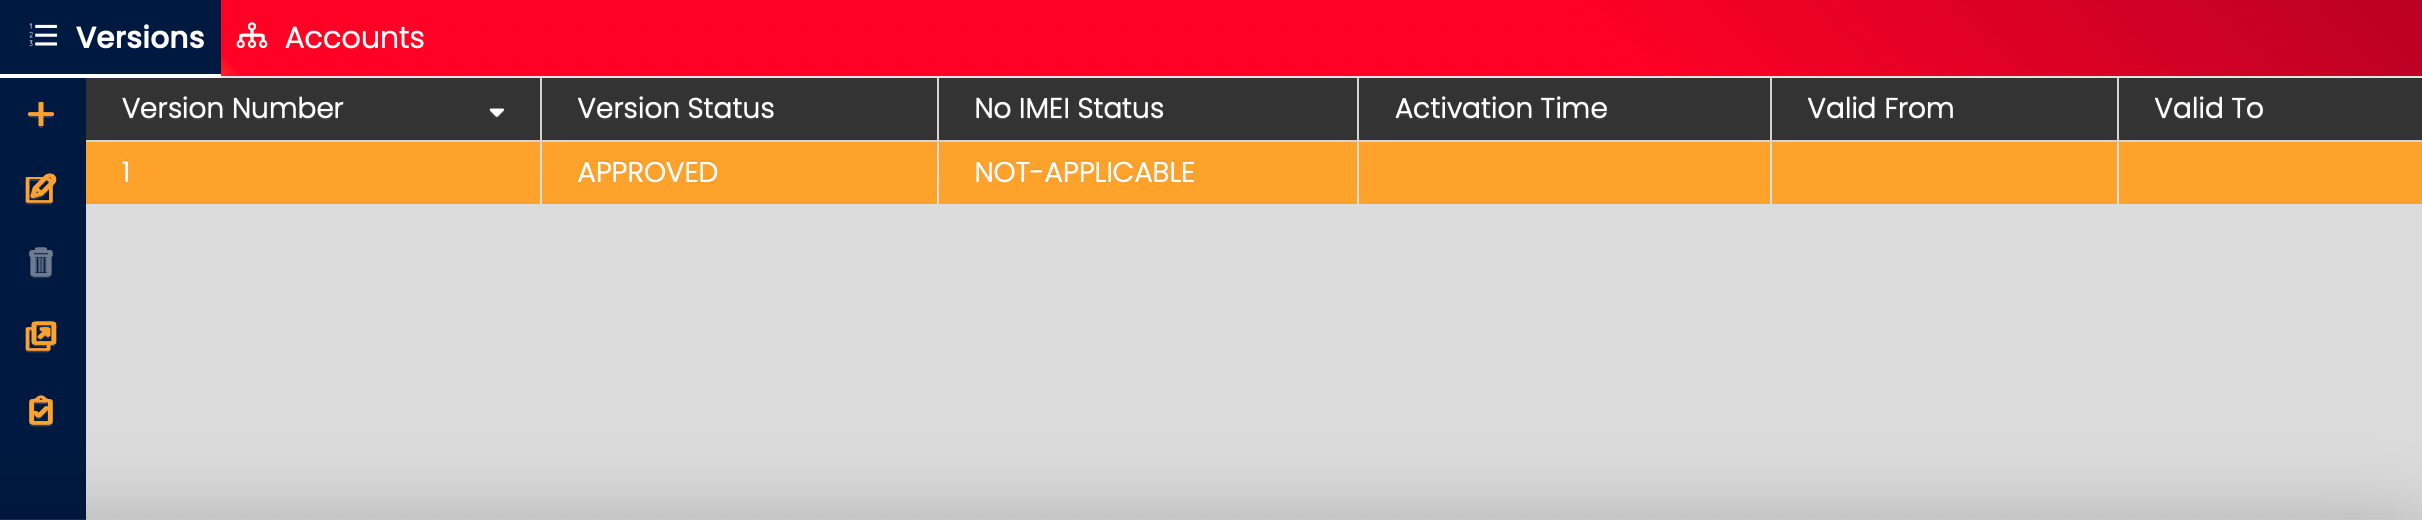
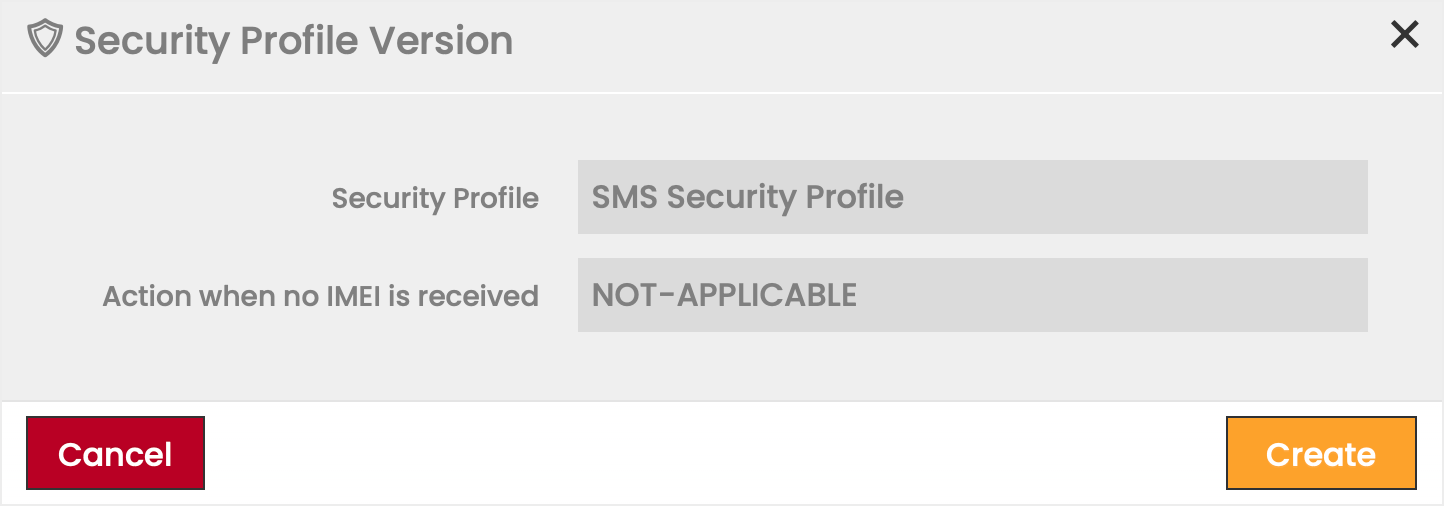
Create Version
Note that the first Version is created automatically when the Security Profile is created.
To create a Version:
- Click on the Add icon in the Versions panel.
- Select action performed when no IMEI is received.
- Click Create to save the new Version.
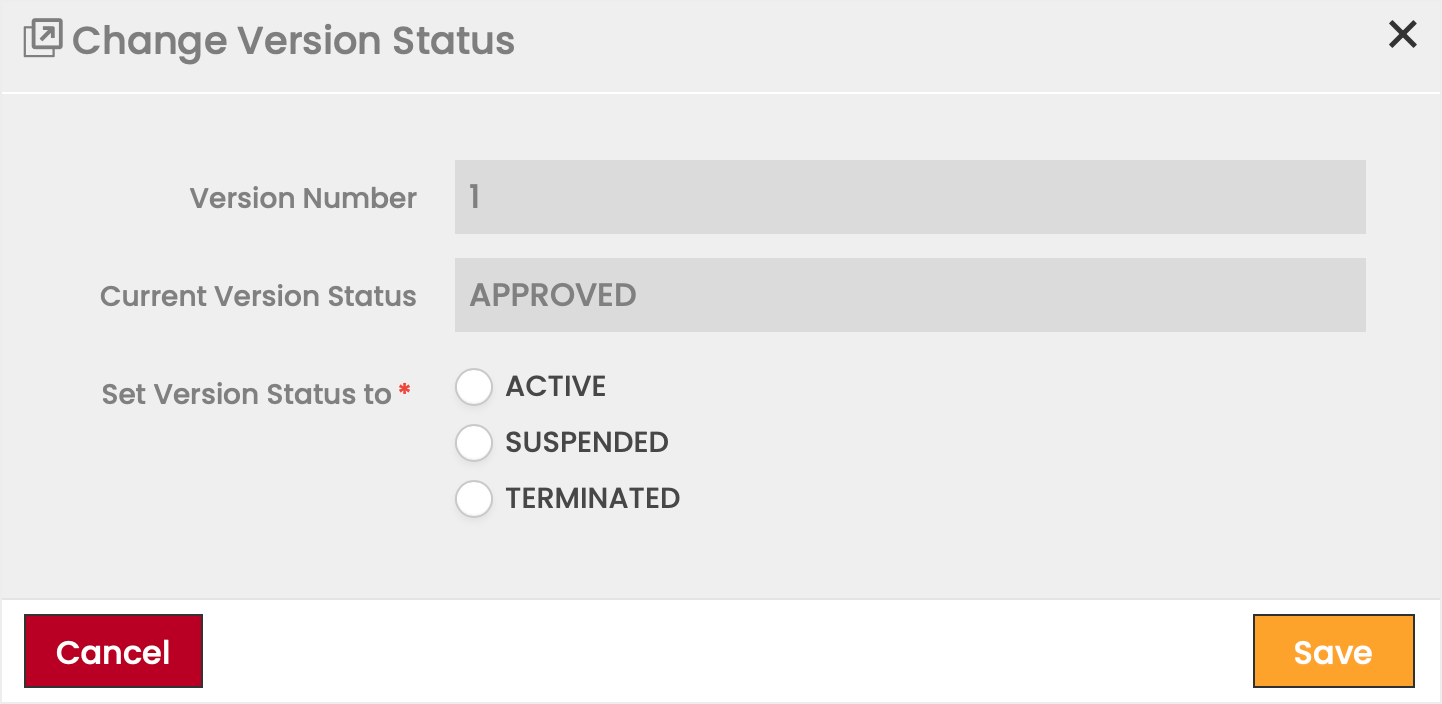
Change Version Status
To change the status of a Version:
- Select a Version in the Versions panel.
- Click on the Change Version Status
 icon.
icon. - Select the target status from the available options.
- Click on Save to apply the change.
Access List
Note:
Each Version of a Security Profile may have a different Access List configuration.
To add or modify the White- or Blacklist of a Security Profile Version:
- Click on the Access List
 icon.
icon. - Create and modify (i.e., edit and delete) the content of the White- and Blacklist.
For a detailed description of the different White- and Blacklist types see the following sections. - Once finished, click on Close.
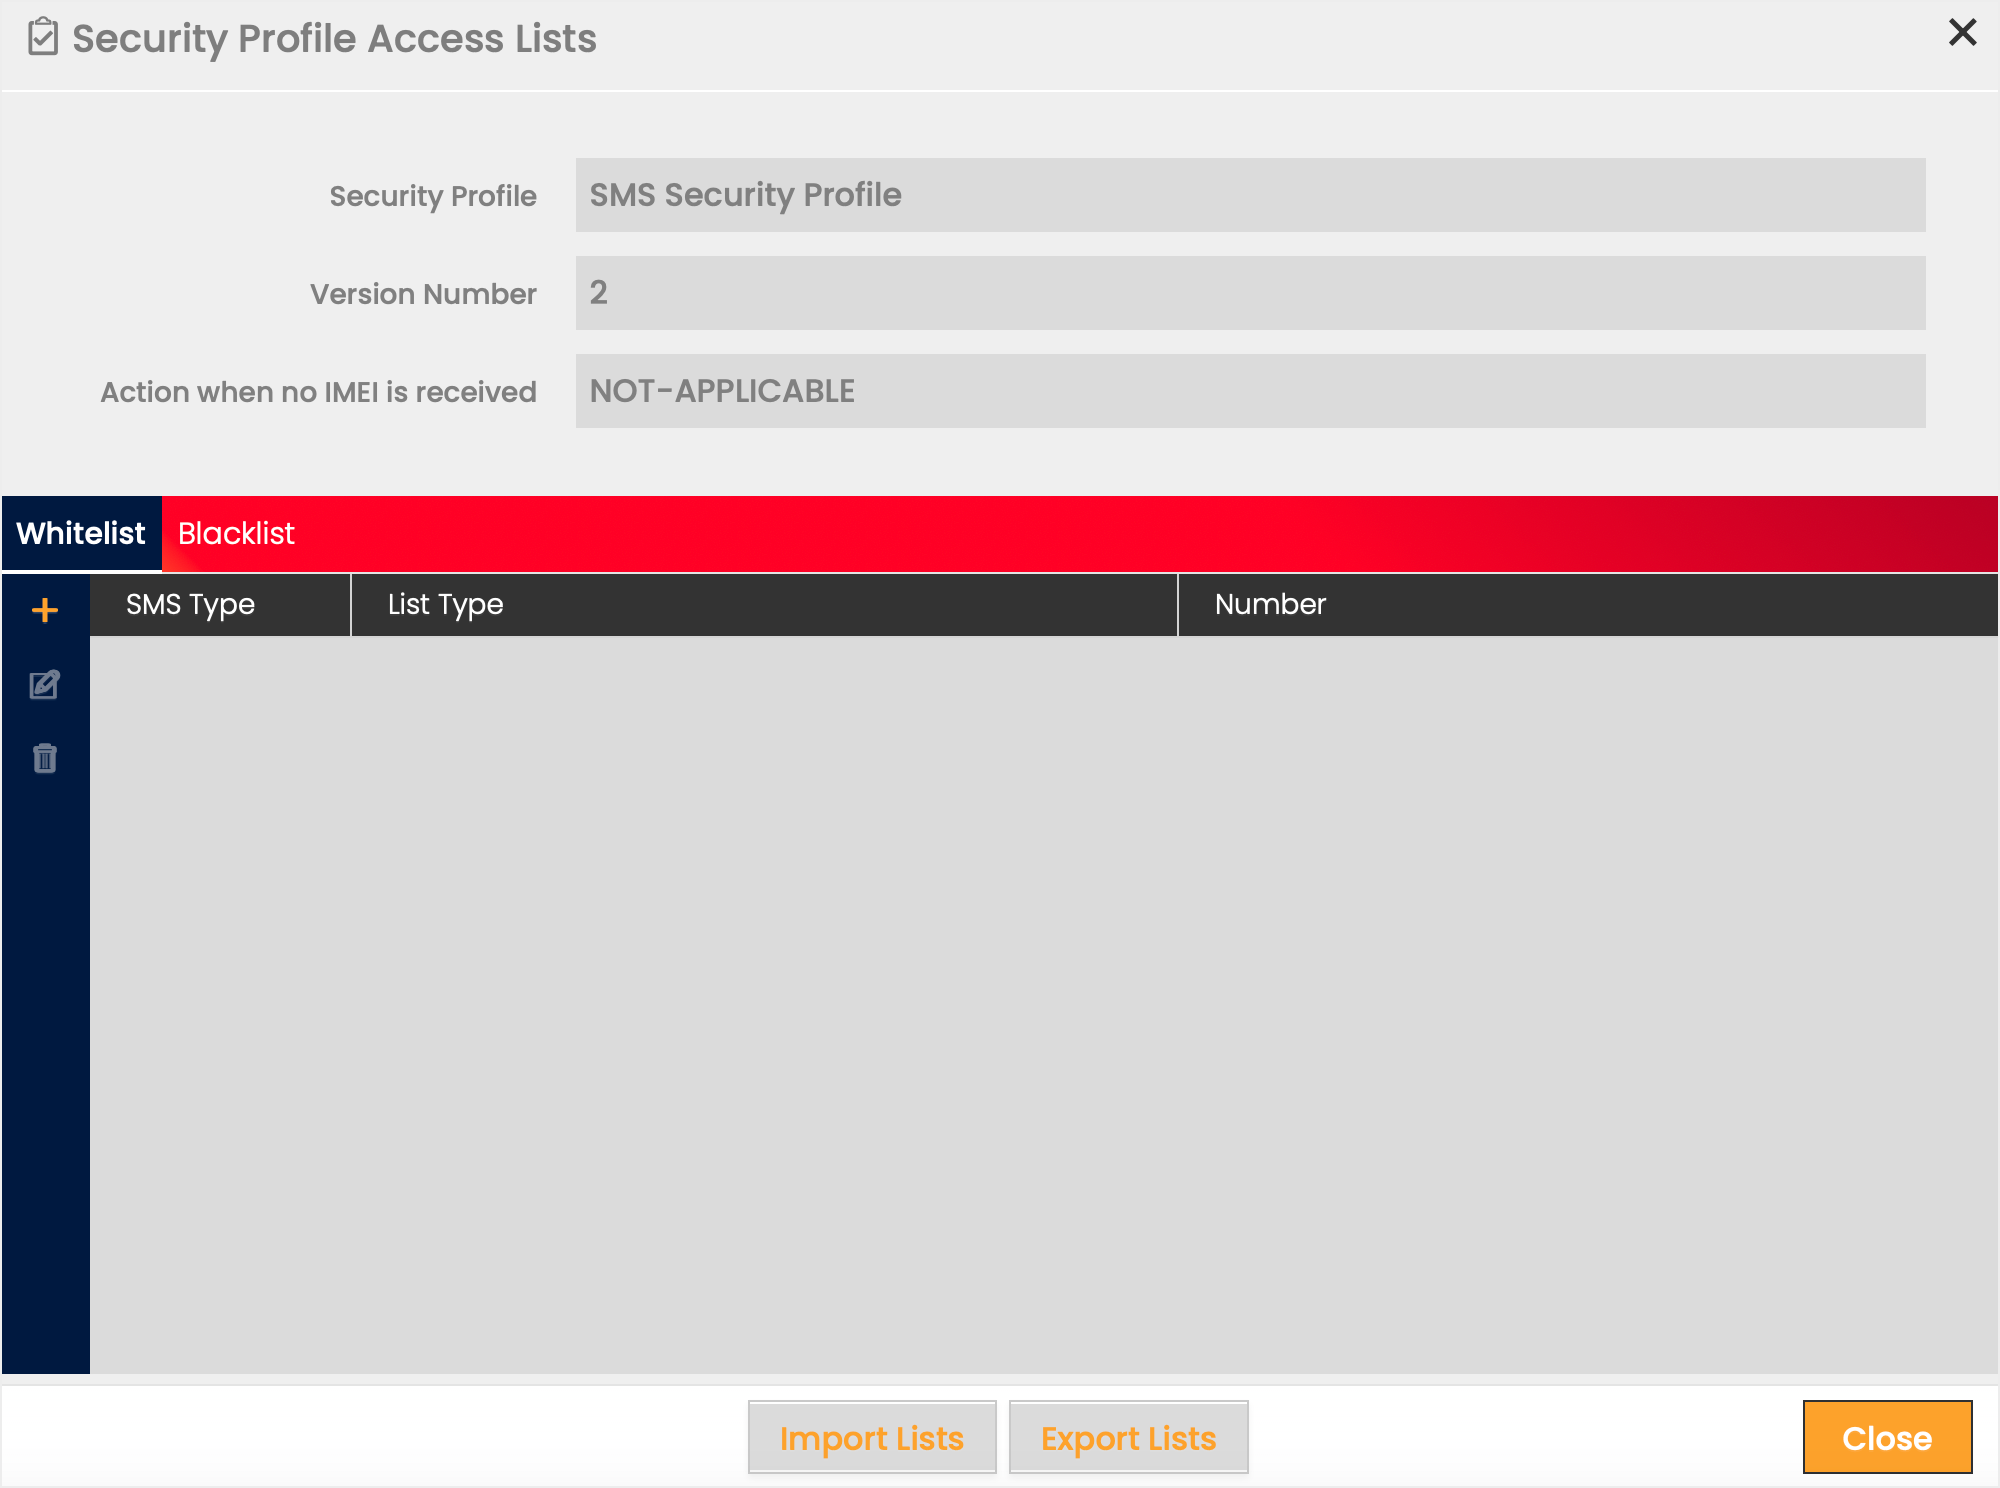
Users can import White- and Blacklist content from CSV files as well as export White- and Blacklist content to CSV files.
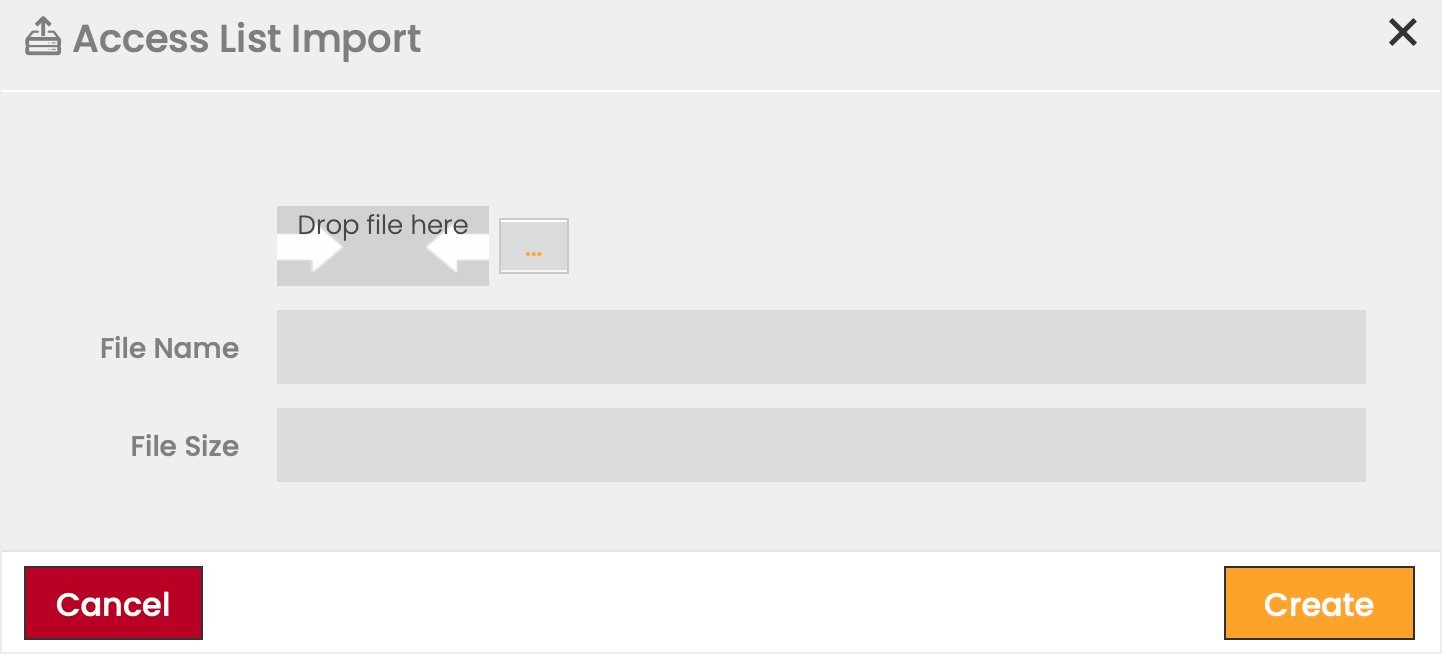
Import Access List
To import Whitelist/Blacklist content:
- Click on the Import Lists button in the Security Profile Access Lists dialog.
- Select the file to be uploaded.
- Click Create to upload the file.
Access List Import Example
WHITELIST,IMEI-INDIVIDUAL,12345678912346
WHITELIST,IMEI-INDIVIDUAL,99566588512347
WHITELIST,IMEI-INDIVIDUAL,99566588512348
WHITELIST,IMEI-INDIVIDUAL,99566588512349
WHITELIST,IMEI-INDIVIDUAL,99566588512350
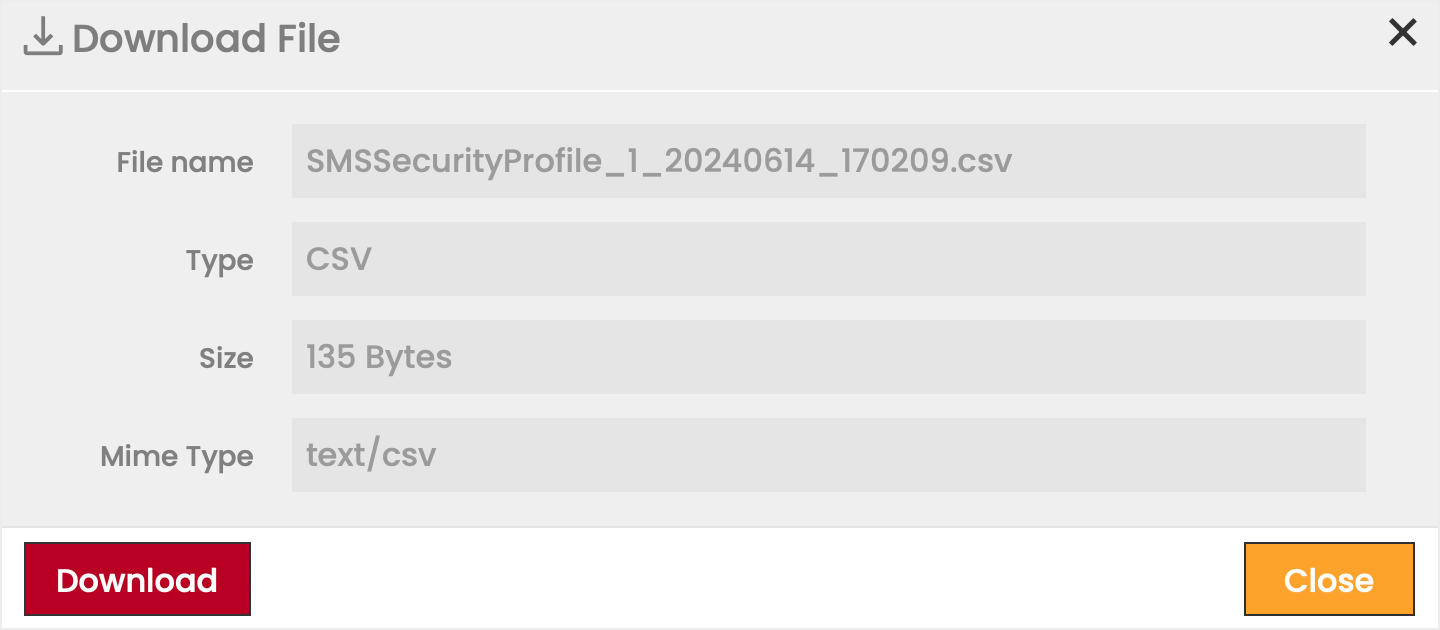
Export Access List
To export Whitelist/Blacklist content:
- Click on the Export Lists button in the Security Profile Access Lists dialog.
- Click Download to finalize the export.
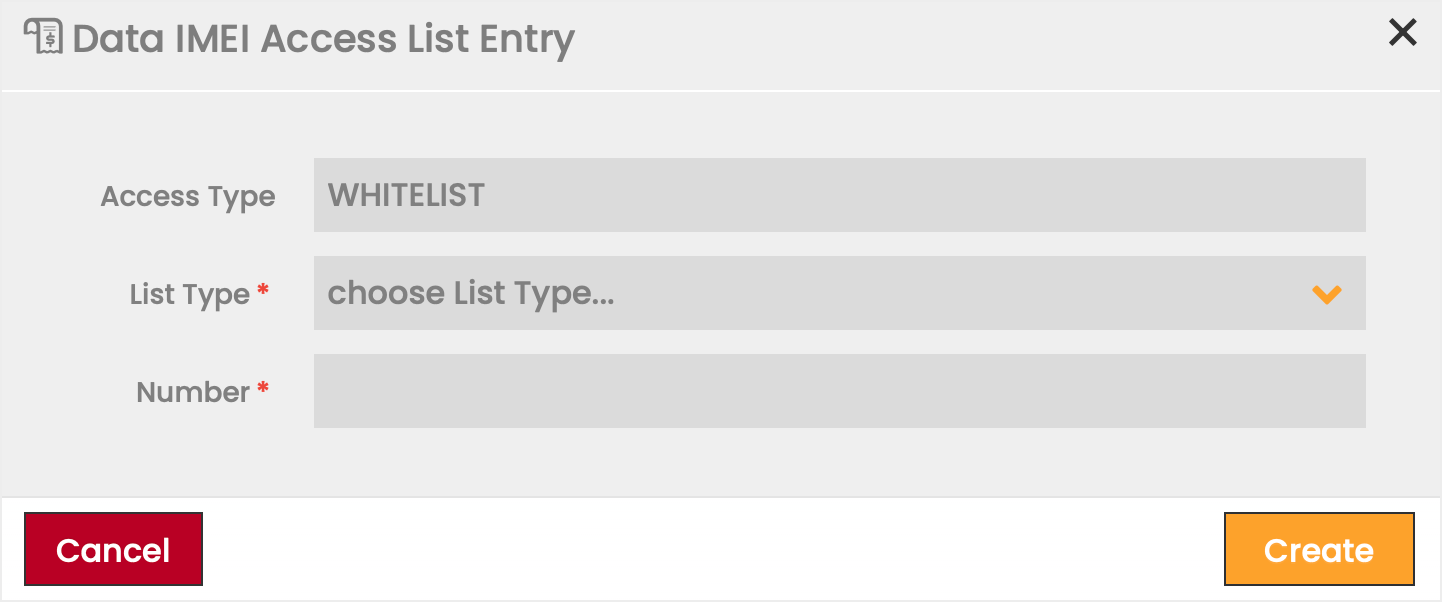
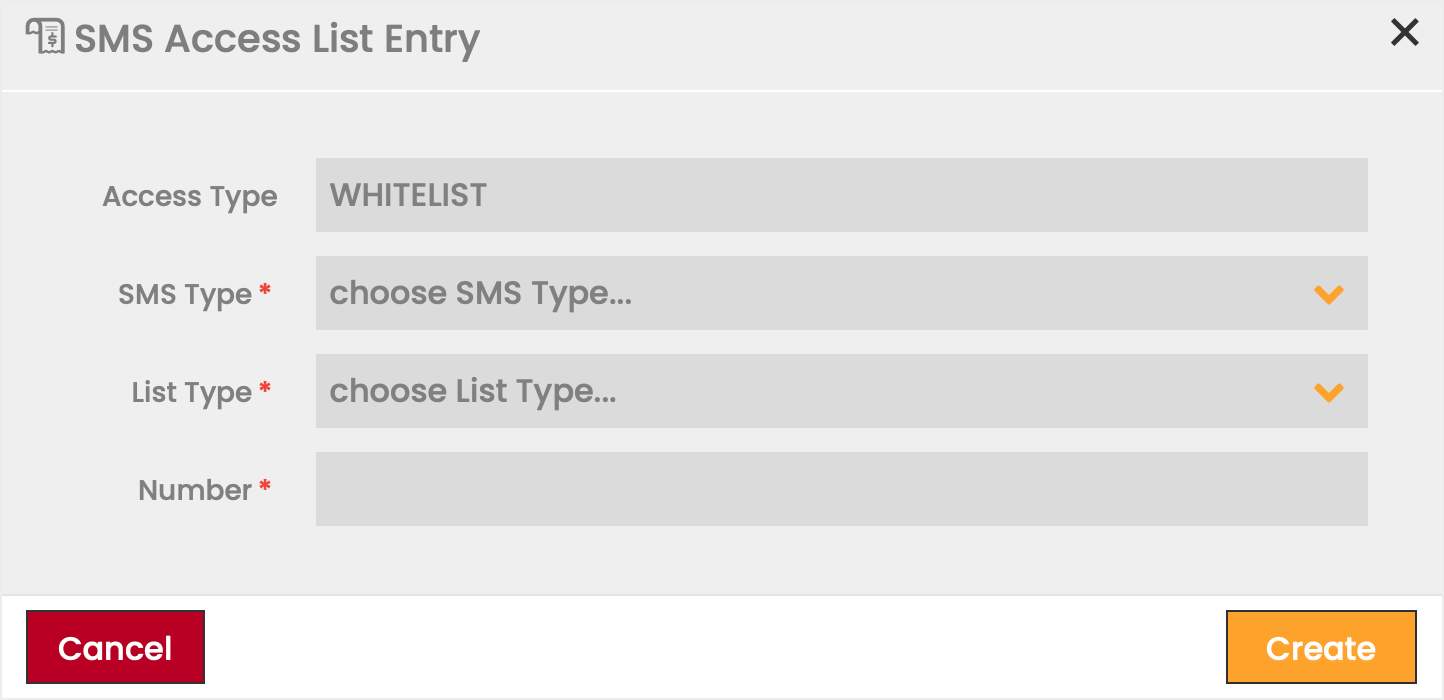
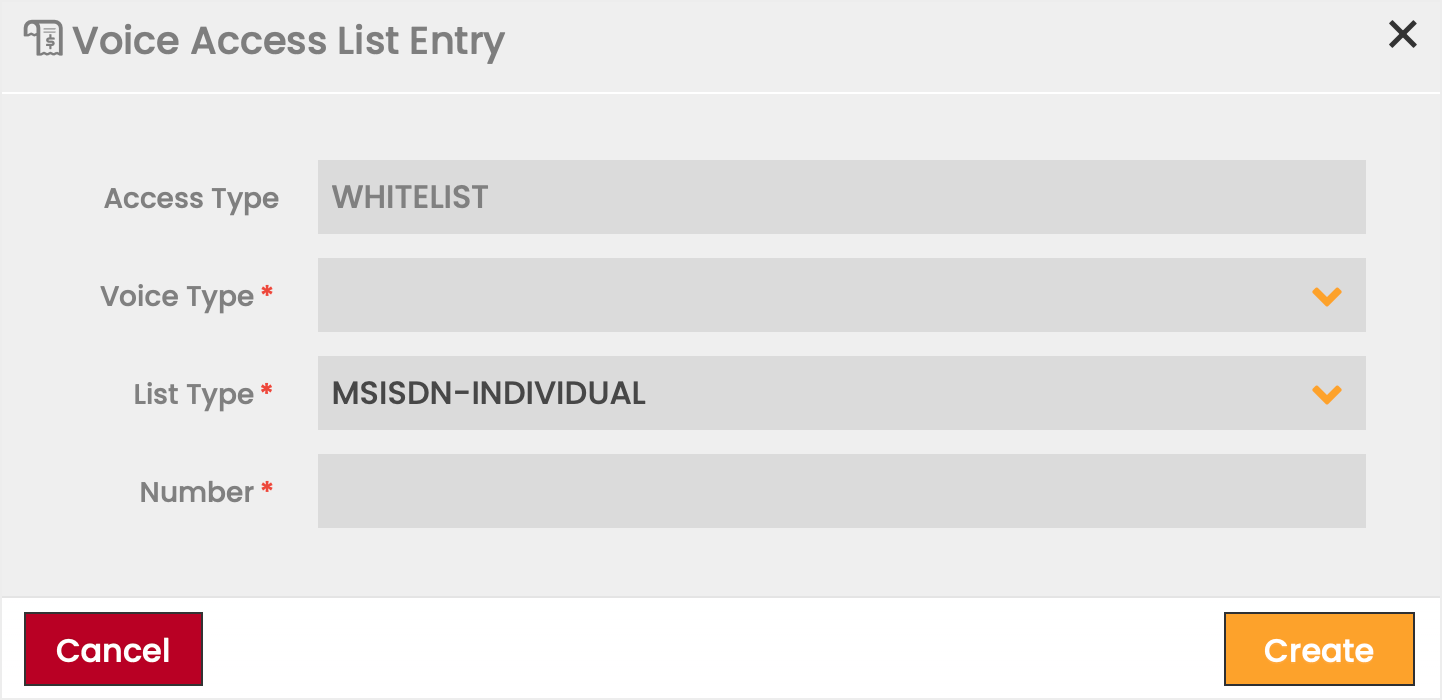
Create and Modify Whitelist/Blacklist
The configuration options are identical when creating Whitelists and Blacklists.
To begin a new Access List entry:
- Click on the Add icon.
- Define the information fields for the entry.
- Click Create to save the entry.
Field | Options | Description |
|---|---|---|
DATA-IMEI-LOCK | ||
List Type | IMEI-Individual, IMEI-Pattern | Individual affects only the one IMEI defined in the Number field. Pattern affects all IMEIs that begin with the numerical sequence defined in the Number field. |
Number | User-Defined | |
SMS | ||
SMS Type | MO-SMS, MT-SMS | MO affects all outgoing SMS from the SIM. MT affects all incoming SMS to the SIM. |
List Type | MSISDN Pattern, MSISDN Individual, MSISDN Range, Shortcode Individual, Shortcode Range Note: The List Types available may vary depending on the CMP instance's configuration. | Pattern affects all MSISDNs that begin with the numerical sequence defined in the Number field. Individual affects only the one MSISDN defined in the Number field. Range affects all possible numerical combinations within the values defined for the fields From and To. |
Number | User-Defined | For List Types Range, an additional field appears so that you may define the start and end of the range. |
VOICE | ||
Voice Type | MO, MT | MO affects all outgoing Voice Calls from the SIM. MT affects all incoming Voice Calls to the SIM. |
List Type | MSISDN Individual, MSISDN Pattern, MSISDN Range Note: The List Types available may vary depending on the CMP instance's configuration. | Pattern affects all MSISDNs that begin with the numerical sequence defined in the Number field. Individual affects only the one MSISDN defined in the Number field. Range affects all possible numerical combinations within the values defined for the fields ‘From’ and ‘To’. |
Number | User-defined | For List Types Range, an additional field appears so that you may define the start and end of the range. |
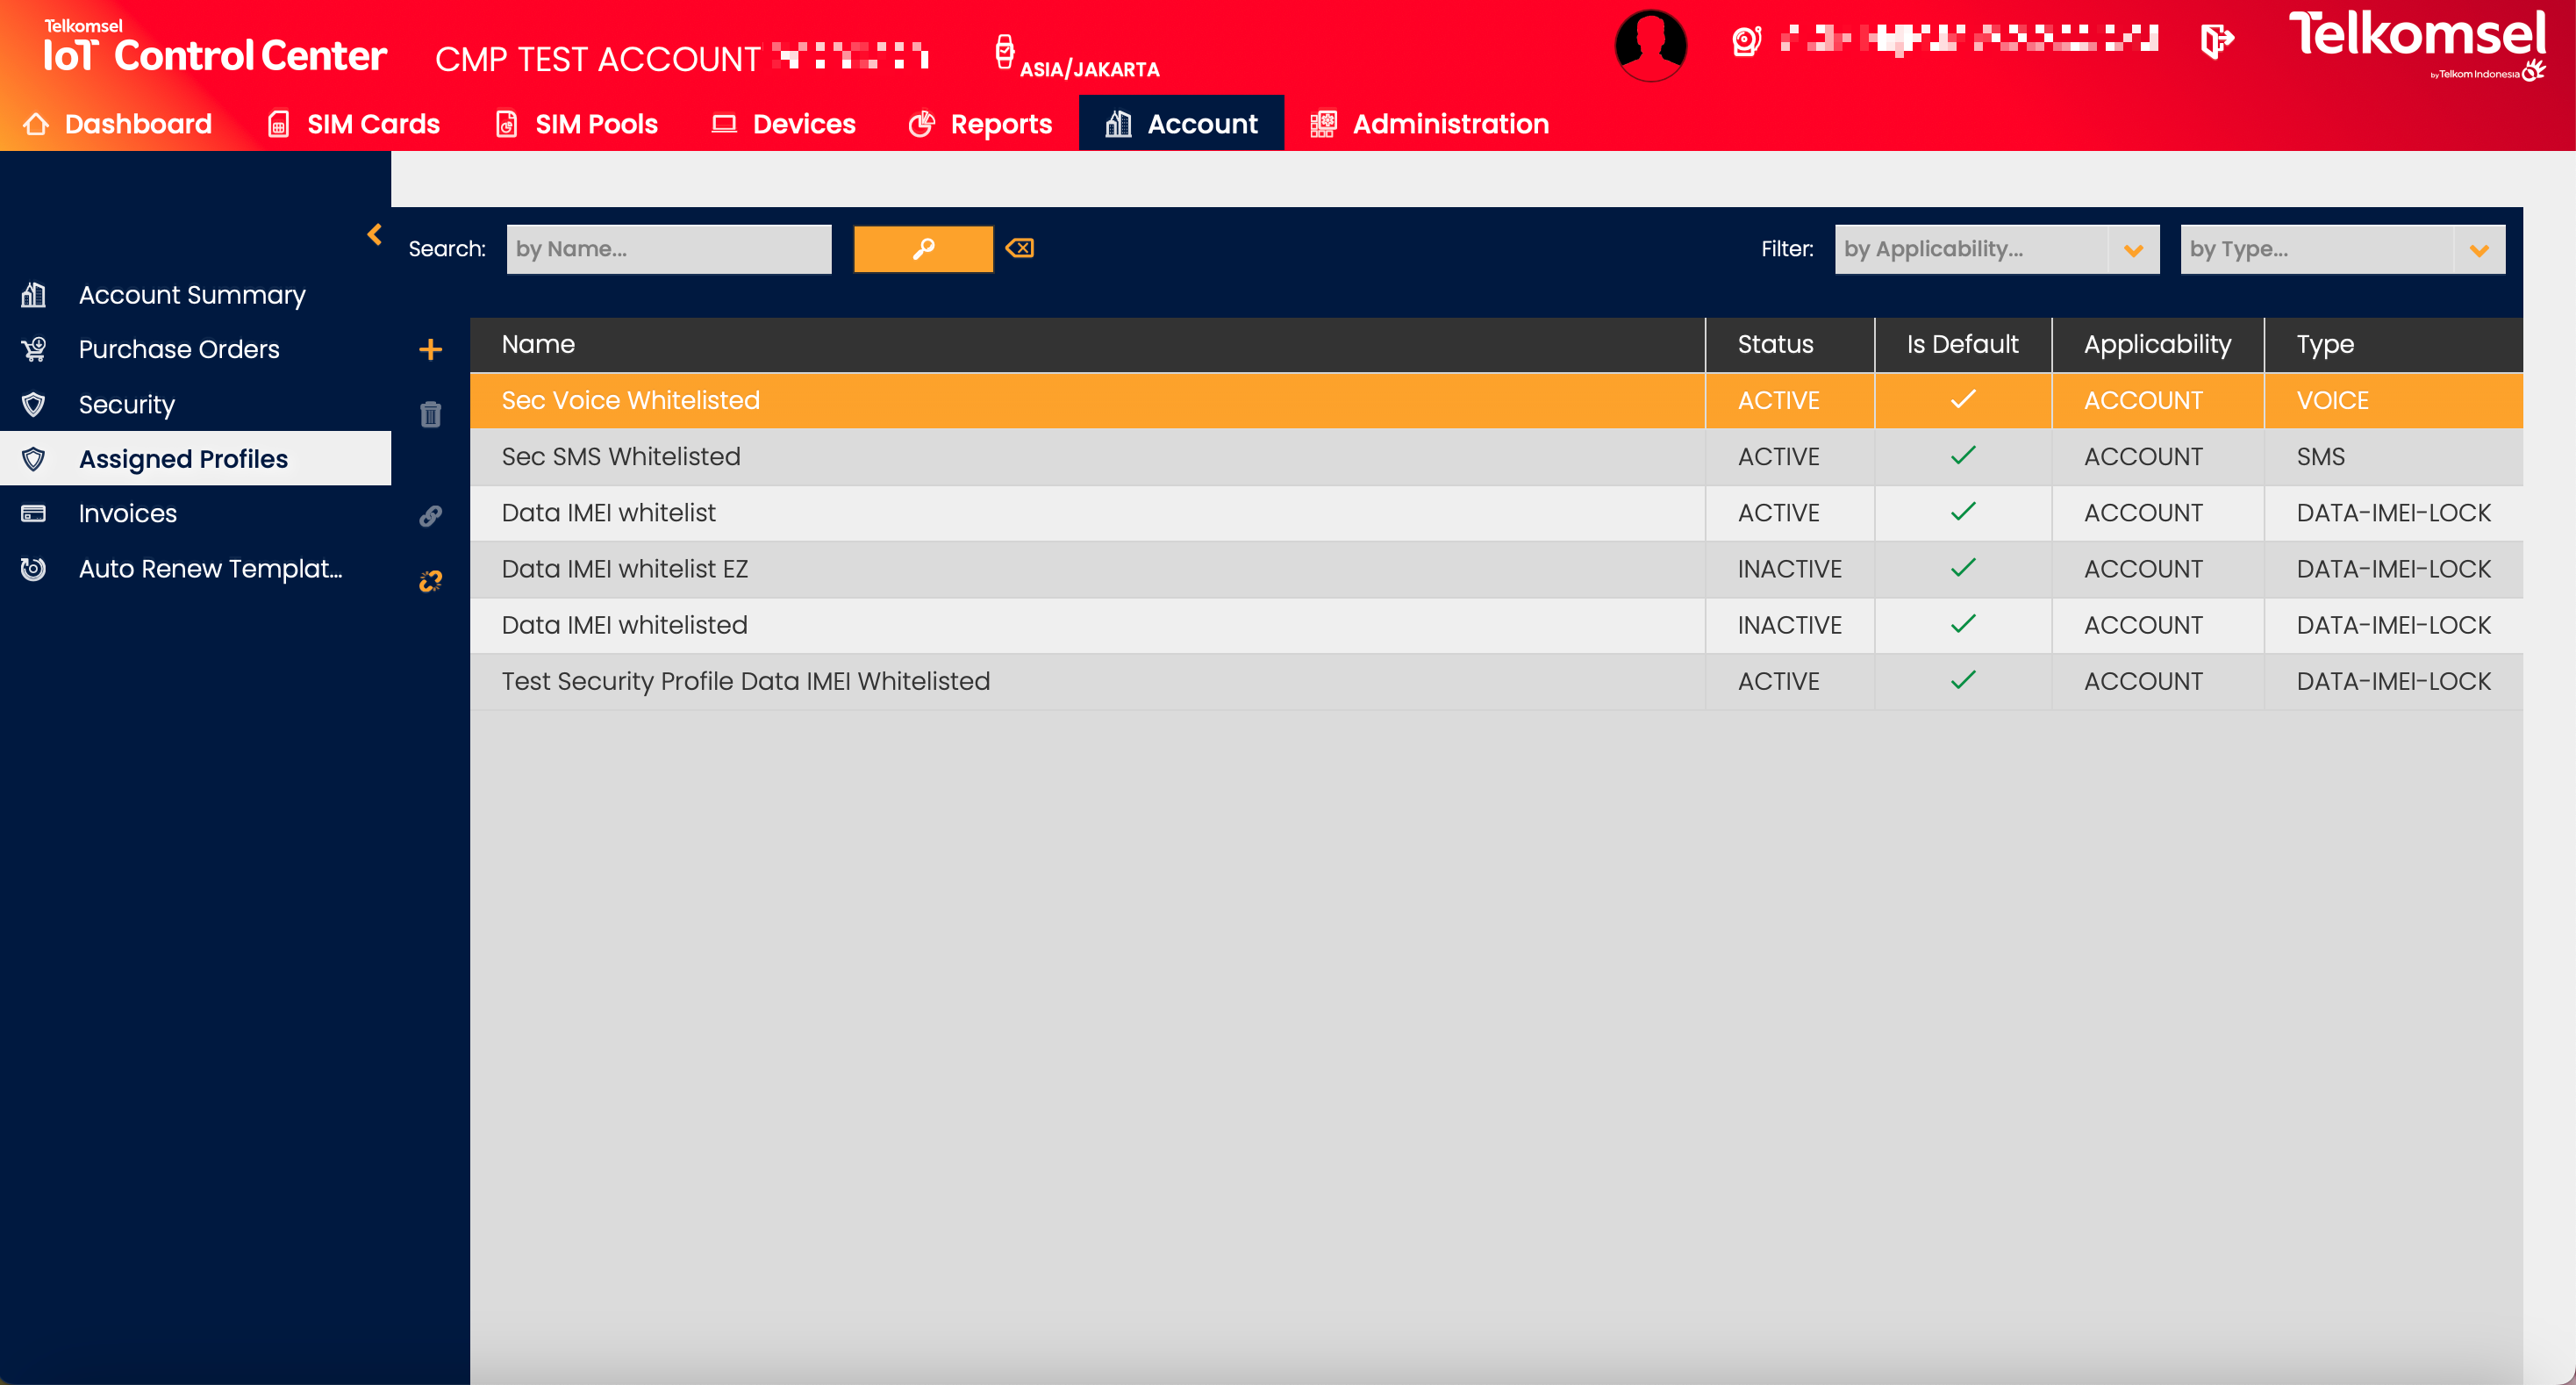
Assigned Profiles
The Assigned Profiles submenu allows Users to view all Security Profiles that have been assigned to the Account. Security Profiles can also be quickly activated or deactivated via the Assigned Profiles section.
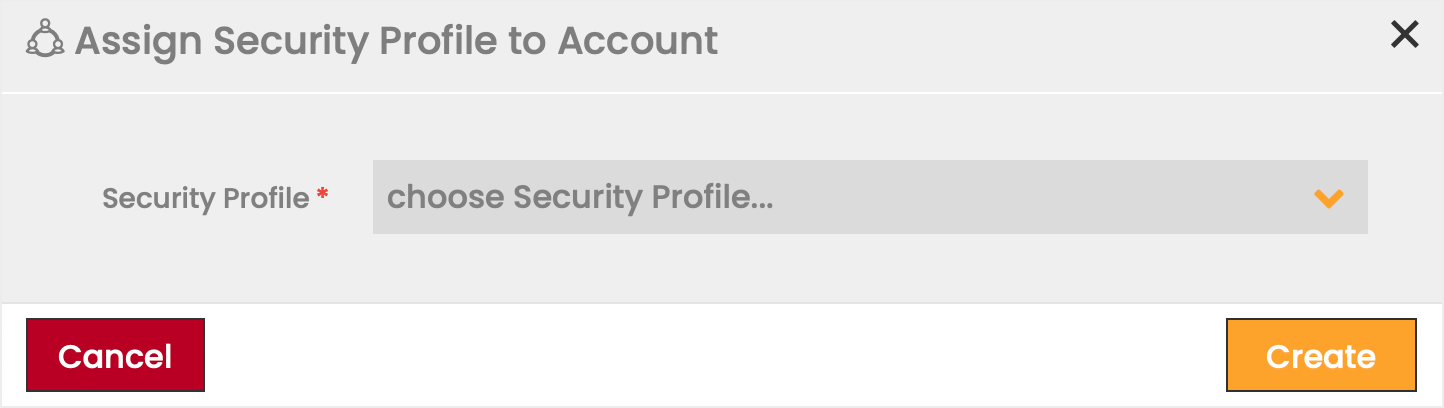
Assign a Security Profile
Note:
In the Assigned Profiles submenu assigning Security Profiles is only possible on Sub-Account level.

To assign a Security Profile to a Sub-Account from the Assigned Profiles submenu:
- Click on the Add icon.
- Select a Security Profile from the available options in the dropdown list.
- Click Create to apply your selection.